• About Me
  • Cookbook Shelf
  • Legalese

Lady Disdain

~ Food, with a side order of snark

Lady Disdain

Tag Archives: cream cheese

The Last of the Hurricane Posts

18 Sunday Sep 2011

Posted by nererue in Desserts, Snacks, Sunday Night Baking

≈ Leave a comment

Tags

cake, cider, citrus, cream cheese, cupcakes, frosting, ginger, gingerbread, lemon, molasses, spice

This is the third and final post about how I cooked my way through the hurricane.  While it’s been good for my blogging productivity, let’s hope there are no more natural disaster-induced motivators, hmm?

Anyway, having survived Irene basically unscathed, I found myself with far more time than I expected the day after.  So I baked, but just because I had the time doesn’t mean I had the inclination to pull out all the baking stops and do something stupidly “Thank God, we’re alive!” manic like eclairs (though I did make eclairs during the blogging hiatus, because there is, in fact, a correct time and place for stupidly manic cooking).  I just wanted something comforting, low on the effort scale, and, since I didn’t know if commuter rail was going to be back up in time for me to go to work on Monday morning, capable of keeping an extra day if necessary.  What fit that particular bill excellently was gingerbread.

As we all know, my quest for ever more obnoxiously in-your-face gingery things is a lifelong one, and in that quest, I had tried the Classic Gingerbread Cake recipe in this January’s issue of Cook’s Illustrated. Apart from the bordering-on-foolhardy quantities of both fresh and powdered ginger, the recipe had two other things going for it: the clever use of stout to deepen the flavor, and the promise of eliminating the sunken and damp middle gingerbread is so often prone to. The recipe delivered on both intense gingery flavor and structural soundness, and was particularly well-received by the coworkers, who as we’ve established are surprisingly amenable to having their palates challenged via their weekly baked goods.

The one snag was that I had no stout on hand, and because I live in a state with patently absurd liquor laws and was not going to make a special trip to the beer distributor on the day after a hurricane to buy stout by the full case, I had to substitute what I did have: a nice hard cider.  To make up the required volume and add some more depth, I spiked it with some really spectacular rum we picked up on our now-annual summer jaunt to the Berkshires with His Lordship’s community orchestra. Despite the fact that the CI people said it wasn’t worth making the recipe with anything but stout, I noticed no dumbing down of the cake once baked.  The cider, rum and very dark blackstrap molasses I had in the pantry contributed more than enough low notes to support the double-ginger assault.  Honestly, I think it’s just as good with the substitution, and since we have not much use for stout while I adore hard cider, I’ll be going with this combination from now on.

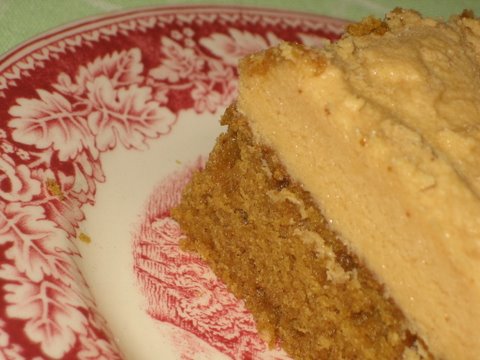
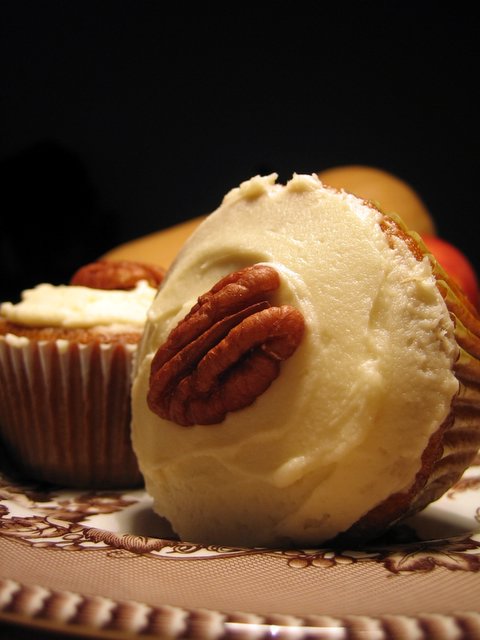
For ease of distribution, as usual with Monday treats, I converted the recipe to cupcakes, which I spread with a cream cheese and lemon curd frosting. The frosting is seriously optional, and if it were up to His Lordship there would be no question about leaving it off, since he didn’t care for the additional sourness.  For those of you who are similarly less obsessed about citrus than I am, feel free to eat them plain or with a dab of salted butter for just the merest bit of decadence.


Gingerbread Cupcakes with Lemon Curd Frosting
(Adapted from Classic Gingerbread Cake, Cook’s Illustrated, January/February 2011)
Makes 30 cupcakes

For the gingerbread:
3 cups all-purpose flour
4 tablespoons ground ginger
1 teaspoon baking powder
1 teaspoon sea salt
½ teaspoon ground cinnamon
½ teaspoon freshly ground black pepper
1 bottle (11.2 ounces) hard cider plus enough dark rum to make 1 ½ cups
1 teaspoon baking soda
⅔ cup blackstrap molasses
⅔ cup honey
1 ½ cups packed light brown sugar
½ cup granulated sugar
4 large eggs
⅔ cup canola oil
2 tablespoons grated fresh ginger

For the frosting (utterly optional):
4 ounces (half a block) of cream cheese, at room temperature
4 tablespoons butter, at room temperature
½ powdered sugar
2 pinches sea salt
Half a (10.5 ounce) jar of lemon curd, or more to taste

Whisk together flour, ginger, baking powder, salt, cinnamon and black pepper in a large bowl and set aside.

Bring the cider and rum to a boil in a small pan over medium heat.  In the meantime, set the oven rack to the middle position, preheat the oven to 350 F and line 2 ½ muffin trays with cupcake liners.

Pour the hot cider and rum into a medium bowl and stir in the baking soda, which will foam up aggressively, then stir in the molasses, honey, and sugars.  Once the sugar has dissolved and the mixture is a bit cooler, whisk in the eggs, oil and grated ginger.

Add the wet mixture into the dry ingredients a third at a time, whisking vigorously between additions until completely smooth before adding the next third.  (For once, you need not be afraid of over-mixing.)  The batter will be quite liquid after the final addition, so use a ladle to divide it evenly among the lined muffin cups.

Tap the filled muffin trays gently against the counter a couple of times to release any air bubbles, and bake 25-30 minutes, until the tops are firm to the touch and a tester comes out mostly clean.  Cool briefly in their tins before lifting out by the liners onto a wire rack and cooling completely.

While the cupcakes are cooling, beat the cream cheese, butter, powdered sugar and salt together in a mixer fitted with the paddle attachment until light.  Beat in the lemon curd and taste, adding more if you want a more pronounced lemon flavor.  Spread the frosting thinly over the cooled cupcakes.

Unfrosted cupcakes will keep for several days at room temperature in an airtight container.  Once frosted, they really should be refrigerated, though you should bring them back to room temperature before serving since the chill will blunt some of the spicy kick.

Notes:

I could have stretched the batter among three full muffin tins, yielding 36 cupcakes, but they would have been slightly smaller than I wanted.  If you prefer that many, start checking them at 20 minutes for doneness. If you want to make a large sheet cake instead, pour the batter into a 9×13 pan, greased and floured, and bake 35-45 minutes.  Cool completely in the pan before frosting and slicing.

The quantity of frosting here is just enough to thinly cover the full batch of cupcakes.  If you want to be much more generous or to pipe designs with it, double the quantities.

Advertisements

A Balm for Writer’s Block

05 Friday Nov 2010

Posted by nererue in Desserts, Snacks, Sunday Night Baking, Uncategorized

≈ 3 Comments

Tags

coconut, cookies, cream cheese, macadamia, sugar cookie

Blogging is going to be light this month, because I have more pressing matters to attend to. I’m still baking for the coworkers every Sunday because they’ve made it clear it’s no longer optional to bring in treats on Monday morning, so there will be things to blog, but it’s bound to be more hit-and-run in nature than I’d normally like.

So, since I have a daily word quota hanging over my head, here’s a very quick write-up of the perfect cookie for the November insanity. Not only are they the kind of yummy calories your brain needs for heavy thinking, but they are practically instantaneous to make because there’s no creaming of butter and they go straight from bowl to oven.

Interestingly, making these cookies last night for a lunch with students today also kicked me out of what had been a pretty weak start to this year’s NaNoWriMo. I was really organized about preparing for it last week, but I was also still pretty tired from a very busy October so the words weren’t coming as fast as they should have. Having fixed fifteen-minute windows between batches actually made me more productive than I had been with unstructured evenings on Monday and Tuesday, and since then I’ve been much more enthusiastic about the whole thing.

These cookies are adapted from the recipe for chewy sugar cookies in this month’s Cook’s Illustrated. Normally, I am no fan of sugar cookies, because almost every one I’ve ever had has been the equivalent of a white canvas — not in a stripped-down-to-essentials, purity of ingredients way like a good shortbread, but in a bland, bland, boring, nothing but flavorless-fat-and-sugar way. I gave this recipe a try, though, because His Lordship loves a chewy cookie, and the recipe relied on the same liquid-fat-ratio math that recently produced the first batch of brownies to really meet his chewiness requirement. I made changes to inject some interest, though, because I still wasn’t buying the whole plain sugar cookie idea.

The texture of these cookies was everything that was promised: crackly on the outside and beautifully chewy on the inside. With my additions of toasted coconut and macadamia nuts, they also have rich coconutty flavor and tender crunch, enough to inspire at least a couple of hundred words.

Since I now have cookies and an awesome new caffeine delivery vehicle, I have no excuses. Back to work!

Coconut-Macadamia Sugar Cookies
(Adapted from Chewy Sugar Cookies, Cook’s Illustrated, November/December 2010)
Makes 4 dozen cookies

1/2 cup finely shredded unsweetened coconut
6 tablespoons unsalted butter
1 1/2 cups granulated sugar
2 ounces cream cheese, in 8 pieces
1/2 cup vegetable oil
1 large egg
1 tablespoon coconut milk (or regular milk)
1 tablespoon vanilla extract
2 1/4 cups unbleached all-purpose flour
1/2 teaspoon baking soda
1 teaspoon baking powder
1/2 teaspoon salt
3/4 cup unsalted roasted macadamia nuts, coarsely chopped
Additional sugar for rolling

In a small nonstick skillet, toast the coconut on medium-low heat, stirring frequently, until golden brown. Set aside.

Preheat oven to 350 F and line multiple baking sheets with parchment paper.

Place the sugar in a large bowl and scatter the cream cheese cubes over the surface. Melt the butter and pour it over the sugar and cream cheese while still warm, stirring and folding with a spatula until most of the cream cheese has melted (streaks and a few small lumps are OK). Switch to a whisk and mix in the oil, then the egg, coconut milk and vanilla until smooth.

Whisk together the flour, baking soda and powder, and salt, and add to the wet ingredients. Whisk until almost incorporated, then stir in the toasted coconut and macadamia nuts.

Fill a shallow bowl with about half a cup of sugar. Scoop up heaping tablespoon-sized bits of dough and roll into balls, dropping them into the sugar and rolling to coat. Set the balls on the baking sheets, two inches apart.

Bake on the middle rack for 12-13 minutes, until turning golden at the edges. Allow to cool to room temperature on the sheets. Store in an airtight container for up to a week.

Notes:

This makes a very soft, oily, weird-looking dough, but it will come out fine, I promise!

Drama-Free Rye Bread

16 Sunday May 2010

Posted by nererue in Breakfast, Side Dishes, Sunday Night Baking

≈ 2 Comments

Tags

bread, buttermilk, caraway, cream cheese, jelly, molasses, red pepper, rye, whole wheat

While there are a number of advantages to living in our neighborhood, which is one of the outermost zip codes but still technically-within-the-urbs, access to stores is not one of them. We have just one tiny mom and pop convenience store within walking distance, so any real grocery shopping requires a car trip.

Even then, the stores that are handiest to us do not, alas, offer particularly good pickings when it comes to the bakery section. During the summer and fall months, there’s a farmer’s market near work at which I can conveniently pick up artisan bread along with vegetables during a lunchtime walk, but that hasn’t started up yet. Since we aren’t going to make a special trip into the city every weekend just for the bakeries or the farmers markets that have already phased in, that frequently means settling for whichever of the supermarket’s bland offerings don’t have a shelf life of eight months thanks to corn syrup or transfats.

This ongoing frustration is what recently prompted me to resume my long-dormant habit of baking bread on the weekends. I have neither the time nor the patience to maintain a sourdough starter again, but I have been making some lower-impact breads every few weeks while the oven is already warmed up for the Monday office treat baking.

One of my newfound favorites is this dark rye bread, which gives you deli-style payoffs with just a little more time and effort than your average quick bread. It uses a bit of a cheat, getting the complex, tangy flavor that usually comes from long fermentation from buttermilk instead, but you’d never know the difference if I didn’t tell you. It also packs in some extra heartiness by using one third whole wheat flour and a spoonful of wheat germ along with the rye and some bread flour for stretch and lift. You’d think, given all that whole grain, that it would be a dense and heavy bread, but it’s actually delightfully soft and easy to slice.

While it makes great sandwiches, the best topping I can think of for a just-baked slice of this bread is a smear of cream cheese and a glistening, sweet and tangy layer of my mother’s pepper jelly, which she was kind enough to make and mail to me after I expressed nostalgia for it. Should you have a less accommodating mom, raspberry jam or currant jelly work very nearly as well.

Buttermilk Rye Whole Wheat Bread
(From Bernard Clayton’s New Complete Book of Breads)
Makes one loaf

1 package (2 1/4 teaspoons) dry yeast
1 cup dark rye flour
1 cup whole wheat flour
1 tablespoon wheat germ
1 tablespoon caraway seeds
2 teaspoons salt
1 cup buttermilk
3 tablespoons molasses
2 tablespoons canola oil
2/3 to 1 cup bread flour

In the bowl of a standing mixer fitted with the paddle attachment, combine the yeast, rye and whole wheat flours, wheat germ, caraway seeds, and salt. Run the mixer briefly to integrate the dry ingredients.

Heat the buttermilk, molasses and oil together in the microwave or a small saucepan until hot, 120-130 F. Add to the dry ingredients and mix at medium speed for 3 minutes. Gradually add just enough bread flour for a firm but not stiff dough to form.

Exchange the paddle for the dough hook and knead the dough in the mixer for 8 more minutes. If necessary, add more bread flour, but err on the side of a slightly sticky dough.

Place the dough in a large greased bowl, cover with plastic wrap, and let rise in a warm place until doubled in bulk, approximately 1 hour.

Pat out the dough on a lightly floured surface to a 14 x 7 inch rectangle. Roll the dough up tightly, pinch the edges to seal, and tuck into a nonstick or greased 9 x 5 inch loaf pan. Lightly cover the pan with plastic wrap and let rise again until doubled, 1 to 1 1/2 hours.

Preheat the oven to 375 F. Bake for 35-40 minutes, until it’s well browned and sounds hollow when thumped on the bottom.

Turn out of the pan and cool completely on a rack before slicing.

Notes:

As with all yeast breads, resist the urge to slice it when it’s still warm, since the steam will promote gumminess in the still-cooling crumb.

This loaf keeps well on the counter in a loosely folded brown paper bag for several days, but you’ll probably devour the loaf well before staleness is a going concern. You can also tightly wrap the loaf in plastic and a layer of foil and freeze it for later use.

Seeing Red

04 Tuesday May 2010

Posted by nererue in Desserts, Sunday Night Baking

≈ 4 Comments

Tags

beets, cocoa, cream cheese, cupcakes, sour cream

So one of my coworkers requested I make red velvet cupcakes for my regular Monday-morning office treat, which posed a bit of a dilemma. While I’m not a food nazi, I do try to avoid the patently unnatural, and red velvet cake is defined by the glowing red produced by huge quantities of artificial food coloring.

What to do: compromise my principles, or settle for less-incendiary red from some more natural source?

As much as I like to please my coworkers, the idea of pouring two bottles of blood-red fluid straight from some Frankenfood plant on the New Jersey turnpike weirded me out too much, so I decided to go the natural route. Since research pointed to beets as an accepted coloring agent in the early history of the red velvet cake, and beets are one of my favorite vegetables, that’s what I chose to experiment with.

My first attempt used a Cook’s Country recipe, since despite my continuing annoyance with Kimball for the polenta fiasco, a lot of bloggers had used it with good results. While I agreed that the taste and texture were good, the pretty magenta color of the batter baked out to an extremely generic tan. I got no complaints when I passed them off as Brown Suede cupcakes, but I still wanted to make genuinely red red velvet without resorting to food coloring.

A little more research turned up the cause of the color change and a potential solution. Rose Levy Berenbaum’s most recent cake book has a recipe for red velvet cake, which uses artificial color but includes a note about baking soda neutralizing the natural pigments in beet juice. Her batter, in contrast, is highly acidic, which should preserve the color.

And it did! Although there was a little fading from bright raspberry to dusky pink in the oven, the resulting cupcakes were definitely in the red end of the spectrum. Because it’s an egg-white-only chiffon batter, it was considerably drier than the conventional Cook’s Country one, but a thick coating of cream cheese frosting mostly took care of it.

I won’t call these the best cupcakes I’ve ever posted here, but they’re perfectly respectable and they are a legitimately non-toxic red. And no, they really don’t taste like beet, I swear. They taste mildly of cocoa and of the cream cheese frosting, which, besides the inflammatory color, is what I understand the whole point of red velvet to be.

Non-Radioactive Red Velvet Cupcakes
(Adapted from Rose Red Velvet Cake in Rose Levy Berenbaum’s Rose’s Heavenly Cakes)
Makes 24 cupcakes

For the cake:

1 large beet, peeled
3 large egg whites, at room temperature
1 1/2 teaspoons vanilla extract
2 cups minus 2 tablespoons cake flour
1 cup granulated sugar
3 teaspoons baking powder
2 tablespoons natural cocoa powder, sifted
1/2 teaspoon salt
1/4 cup grapeseed or canola oil
4 tablespoons (1/2 stick) unsalted butter, at room temperature
1/2 cup buttermilk

For the frosting:

8 ounces cream cheese, softened
8 tablespoons (1 stick) unsalted butter, softened
1 tablespoon creme fraiche or sour cream
Pinch of salt
1 cup powdered sugar
1/2 teaspoon vanilla extract

Set the rack to the lower-third position and preheat the oven to 350 F. Line two muffin tins with paper liners.

Run the beet through a juicer. Skim off any foam, and measure out 2 tablespoons of the juice. Whisk the beet juice and vanilla into the egg whites just until the color is evenly distributed.

Whisk together the flour, sugar, baking powder, cocoa and salt in a medium bowl.

Mix the oil and butter together in a stand mixer fitted with the paddle attachment for 1 minute on medium speed. Add the flour and buttermilk, and mix on low until the dry ingredients are moistened, then increase the speed to medium and beat 1 1/2 minutes longer. Scrape down the bowl and add the egg mixture in two parts, beating 30 seconds on medium speed after each addition.

Using an ice cream scoop, evenly divide the batter among the cups. Bake for 16-18 minutes, until the tops spring back when pressed lightly. Cool for a few minutes in the tins, then turn out onto a wire rack to cool completely.

While the cupcakes are cooling, combine the cream cheese, butter, creme fraiche and salt in a food processor and pulse until smooth. Add the sugar and vanilla and keep pulsing until evenly incorporated. Spread the cupcakes with this frosting once they’ve cooled.

Notes:

If you’re less gunshy about fake food coloring than I am, you can replace the beet juice with the same amount of liquid red food color to get a really bright red cake, but if you’re going to do that, I’d go with the moister, richer Cook’s Country version.

Don’t Underestimate Your Audience

08 Sunday Nov 2009

Posted by nererue in Breakfast, Celebrations, Desserts, Signature Dishes, Snacks, Sunday Night Baking

≈ 2 Comments

Tags

cake, carrot cake, carrots, cream cheese, muffins, parsnip, spice

Not your garden-variety carrot cake

I must confess that this entry in the weekly baking series had me a little nervous, and I even considered lying by omission with respect to one of the key ingredients when I brought it into work on Monday. I mean, I’m a massive fan of the lowly parsnip and consider it utterly inoffensive, but I know people can have weird knee-jerk reactions when it comes to vegetables, especially in baked goods. I’ve known people to freak out over plain old zucchini bread.

But I obviously worried over absolutely nothing, because I can’t even adequately describe what a huge hit this was with the coworkers. The “parsnip” prominently displayed on the accompanying Post-It note doesn’t seem to have deterred anyone, and people were gushing and demanding the recipe for days after. And who could blame them, when these muffins are so fantastically spicy, chewy, sweet and moist that the cream cheese frosting I offered on the side really was viewed as superfluous?

So what possessed me to mix parsnips into a carrot cake recipe in the first place? It was a lucky impulse born of nostalgia and facilitated by the fact that, just as I do with cranberries, I hoard parsnips this time of year. They start showing up in supermarkets right before the holidays before disappearing rapidly again in January. Don’t ask me why, since I think they’re lovely even after Christmas has passed, but produce buyers can be short-sighted that way.

I had been intending to make carrot cake for the past month or so, since our anniversary. My prior love of carrot cake for its own sake was amplified when it unexpectedly became our wedding cake thanks to the very obliging host of the B&B His Lordship and I had eloped to. We hadn’t planned on having one and had in fact gone all-out at dinner, but were surprised and touched when we got back to our room and found the prettily decorated top tier of her friends’ anniversary cake, which the host had brought home for us from their party. It made a great breakfast the next morning, and ever since I’ve had a special craving for carrot cake this time of year.

While I was pulling the carrots out of the vegetable bin, I saw the parsnips and thought what the heck. Parsnips are practically the same as carrots anyway, and although they’re pretty rare, I had heard of parsnip cakes before. Just to play it safe, I went with a 50-50 ratio and added the resulting shred to my favorite carrot cake recipe, which is already fabulously easy and delectable.

Do you notice the parsnips? Well, not unless you really concentrate. They’re so pale that they disappear into their speckled surroundings once baked, and all you see are the sturdier carrots. If you focus, you can taste their distinctively spicy sweetness behind the cinnamon, nutmeg and cloves, but the non-cognoscenti could just as easily assume that was a pinch of cardamom or ginger instead. If you’re really skittish about the parsnip thing, or want to try this in May when there’s nary a parsnip to be found, you can make it with all carrots instead, and I promise you’ll love them just as much.

If you do fancy an adventure or want to sneak some additional variety into your kids’ or your coworkers’ diets, though, try this out! It’s fun, and who says you shouldn’t play with your food?

Carrot-Parsnip Spice Muffins
(Adapted from Carrot Cake in America’s Test Kitchen’s The New Best Recipe)
Makes 2-3 dozen muffins

1 1/2 cups unbleached all-purpose flour
1 cup “white” whole wheat flour
1 1/4 teaspoons baking powder
1 teaspoon baking soda
1/2 teaspoon fine sea salt
1 1/4 teaspoons ground cinnamon
1/2 teaspoon ground nutmeg
1/8 teaspoon ground cloves
1 1/2 cups grated carrots (about 3 medium)
1 1/2 cups grated parsnips (about 3 medium)
1 1/2 cups granulated sugar
1/2 cup packed brown sugar
4 large eggs
1 1/2 cups canola or grapeseed oil

For the frosting (seriously optional):

8 ounces softened cream cheese
5 tablespoons softened unsalted butter
1 tablespoon sour cream
1/4 cup honey
1/2 teaspoon vanilla extract
1 cup confectioner’s sugar

Adjust the oven rack to the middle position and preheat oven to 350F. Line 2-3 muffin tins with paper liners.

In a large bowl, whisk together the flours, baking powder, baking soda, salt and spices.

Combine the sugars and eggs in a food processor fitted with the metal blade and process until the brown sugar has completely broken up and distributed throughout, about 30 seconds. With the machine running, add the oil through the feed tube in a steady stream, and continue processing until the mixture is light in color and resembles mayonnaise.

Add the liquid mixture to the dry ingredients and fold until the flour is mostly incorporated, then fold in the carrots and parsnips.

Fill the tins with the batter half to two-thirds full, depending on how many muffins you would like to end up with and how ample their tops. Bake until a skewer inserted into a muffin comes out clean, 25-28 minutes. Cool the muffins completely in their tins.

In a food processor, combine the cream cheese, butter, sour cream, honey and vanilla. Process until well combined, then add the powdered sugar and continue processing until smooth. If the frosting is not sweet enough, add a bit more honey and pulse again.

Ice the cooled muffins with the frosting, or serve the frosting alongside as a spread. Unfrosted muffins will keep at room temperature for a day, but frosted ones and any leftover frosting should be covered and refrigerated.

Notes:

If it seems as though I’m using a lot of this “white” whole wheat flour, which is made by King Arthur and a few other vendors, it’s because I really love the stuff. Not only is it a snap to swap out some of the white flour in a recipe and add some extra nutrition value without any textural harm at all, but the extra wheatiness really plays well in recipes with a lot of spice, like this one. If you don’t want to go that route, simply use 2 1/2 total cups of all-purpose flour instead.

I didn’t want any embellishments this time, but if you’re a fan of walnuts and/or raisins in your carrot cake (I like the former but can seriously leave the latter), you could stir in 1 to 1 1/2 cups of either or both along with the carrots and parsnips.  In that case, you will probably also have to add at least 5 more minutes to the baking time.

In the future, I may try making this entirely with parsnips. If it’s a success, I’ll definitely report back.

The Apotheosis of the Forgotten Banana

19 Tuesday Aug 2008

Posted by nererue in Celebrations, Desserts, Sunday Night Baking

≈ 1 Comment

Tags

banana, buttermilk, cake, cream cheese, dulce de leche

Banana Buttermilk Cake with Dulce De Leche Cream Cheese Frosting

Banana Buttermilk Cake with Dulce De Leche Cream Cheese Frosting

One of my favorite workday lunches is ice-cold fruit salad, obtained from a sidewalk food truck near my soon-to-be-ex office.  It’s quick, healthy, delicious, and during the summer, an embarrasingly cheap source of super-ripe, ready-peeled pineapple and mangoes.  There is also a small dividend in going this route: much as you would get a complimentary roll with your soup, the fruit truck gives you a banana on the side.

I usually save the banana for my mid-morning energy slump the next day, but sometimes I’m so tied up or un-hungry that the bananas just sit under my computer monitor, getting progressively browner, until I’m faced with the choice of wastefully throwing them out or taking them home and figuring out what to do with them.

I had two such pathetically neglected bananas this week.  Instead of taking my usual path of least resistance and freezing them for adding body and sweetness to a smoothie, I decided to incorporate them into a cake for Sunday baking. To kill three birds with one stone, I would ice this cake with a caramel frosting using that last straggling block of cream cheese and as much dulce de leche as I could reasonably cram in without losing structural integrity.

I set out with confidence, because as any Argentine kid will tell you, bananas and dulce de leche are a classic comfort-food combination, and the cake recipe I was starting with was Rose Levy Berenbaum’s, so it couldn’t possibly be anything less than great even after a couple of careful modifications.

Great, nothing; it was unbelievable. This is the most microscopically-crumbed, cloud-light, pillow-soft cake you have ever put in your mouth.  It’s the 1000-threadcount goosedown duvet of banana cakes.  His Lordship, who routinely mehs cake, practically skipped down to the kitchen for an unprecedented second serving, calling “More cake!” That’s how good this is.

The merest whiff of a critique is that it could have had just a teeny bit more you-lookin’-at-me? banana flavor to really stand up to the dulce de leche frosting, but I think that’s the fault of my slightly diminutive bananas, which measured a little less than the full cup that was called for.  That’s easily fixed next time (and oh, is there ever going to be a next time) with larger or extra bananas.

So go ahead. Willfully ignore your bananas until they turn not merely brown but thoroughly black and squishy, and then transmute them into this cake.  They will not only not reproach you, they will cry your praises as they ascend in majesty to assume their appointed place in the cakely pantheon.

Banana Buttermilk Cake with Dulce de Leche Cream Cheese Frosting
(Adapted from Rose Levy Berenbaum’s Cordon Rose Banana Cake, The Cake Bible)
Serves 8-10

Cake:
3/4 cup plus 2 tablespoons granulated sugar
2 large, very ripe bananas (approximately 1 cup, mashed)
1/2 cup buttermilk
2 large eggs
Grated zest of one lemon
2 teaspoons vanilla paste or extract
2 cups sifted cake flour
1 teaspoon baking soda
3/4 teaspoon baking powder
1/2 teaspoon fine sea salt
10 tablespoons (1 1/4 sticks) unsalted butter, softened

Frosting:
8 ounces (1 block) cream cheese, softened
6 tablespoons (3/4 stick) unsalted butter, softened
1/2 cup powdered sugar, sifted
1/4 teaspoon Maldon or other coarse sea salt, crushed fine between your fingers
1/2 cup dulce de leche, plus 2 additional tablespoons for drizzling

Leave all ingredients on the counter for at least 30 minutes to come to room temperature before starting.

Preheat oven to 350 F.  Line an 8 x 8 inch square pan with nonstick foil or parchment paper.

Process the sugar in a food processor until it achieves a superfine consistency, but don’t process so long that it turns to powdered sugar.  Remove from the processor bowl and set aside.

Combine the bananas and buttermilk in the processor and process until smooth.  Add the eggs, zest and vanilla paste, and pulse a couple of times to blend.

In the bowl of a stand mixer fitted with the paddle attachment, combine the sugar and remaining dry ingredients and mix on low briefly to blend and aerate.  Add the butter and half the banana mixture, stirring on low until the dry ingredients are just moistened, then increase to medium speed and beat for 90 additional seconds.  Scrape down the sides and add the remaining banana mixture in two batches, beating for 20 more seconds after each addition.

Scrape the batter into the prepared pan and smooth the top.  Bake for 40-50 minutes or until a toothpick inserted in the center comes out clean.

Cool the cake in the pan for 10 minutes, then carefully lift out of the pan by the overhanging foil or parchment, and transfer to a rack to cool completely.

While the cake is cooling, prepare the frosting by beating the cream cheese and butter on medium-high speed until fluffy. Scrape down the bowl and beat in the powdered sugar and salt, then scrape down again and beat in the 1/2 cup of dulce de leche.  Cover and chill until the cake is ready to be frosted.

Spread the top and sides of the cooled cake thickly with the frosting. Slightly warm the additional dulce de leche in the microwave until pourable but not hot (around 10-15 seconds), and drizzle over the frosted cake to form a decorative pattern.

Don’t refrigerate it unless you really have to, since the cold will cause it to loose a little of its ethereal lightness.

Notes:

Rose called for baking this in a 9-inch round or springform cake pan, but the only pans I still have available are the reusable but ultimately disposable Glad ones I bought as extras for the holiday baking, in 8×8 and 9×12 sizes.  This required a longer bake time, and obviously resulted in a smaller but higher and more domed cake.  I assume you’re not operating under my circumstantial handicap, so bake this in a 9-inch pan for 30-40 minutes if you can.

The original recipe used sour cream, which I replaced with buttermilk left over from the fresh blackberry pancakes that were my incentive for getting up at 8 on a Sunday to do more packing.  I think the thinner texture of the buttermilk added even more lightness to the cake, but if you don’t have any, use the equivalent amount of sour cream or plain (but not nonfat, please) yogurt.

I don’t want the fact that not everyone has a kilo can of dulce de leche to use up to stop you from making this cake.  Top it with whatever you like, from the sour cream ganache that Rose suggested to a simple dollop of whipped cream, but for the love of all that is delicious, make this cake. You will never lament an overripe banana again.

Buzz Buzz Buzz

08 Friday Aug 2008

Posted by nererue in Desserts, Sunday Night Baking

≈ 6 Comments

Tags

chocolate, cream cheese, honey

Chocolate Honey Cake with Honey Cream Cheese Frosting

Chocolate Honey Cake with Honey Cream Cheese Frosting

Honey is my favorite souvenir purchase when I travel, because it’s easy to obtain, rarely ridiculously priced, takes up little luggage space, and keeps well when I get it home. More compellingly, each one will taste so clearly and uniquely of its place that it will be like being there again. This is why I have seven different containers to get rid of, representing five different states and two different countries. Pooh Bear’s got nothing on me.

In searching for honey-intensive recipes for Sunday baking, I remembered the cutesy Nigella chocolate cake with marzipan bees from Feast, which uses a good half-cup. I liked the idea of the cake, but decided to ditch the chocolate glaze in favor of a honey-laced cream cheese frosting, which would let me use up the second of the three blocks of cream cheese I inherited in addition to more honey. I also thought it would be nice to have a bit of a tangy contrast to what would undoubtedly be a very sweet cake.

The finished cake was really popular with the coworkers and had an interestingly fudgy, gingerbready texture and good strong honey base-note, but I was disappointed in the surprisingly weak chocolate flavor. As His Lordship observed, it was pretty much just sweet, without any identifiable characteristics. I do like the idea of a honey and chocolate cake, but next time I might start with a different, more deeply chocolate base recipe and experiment with the honey substitution myself.

On the other hand, the frosting, which was of my own devising, was great and highly repeatable as-is. It was nicely honey-flavored without being cloying, and would be equally at home over a carrot or spice cake. This is a great place to use a slightly more assertive honey, since all that creamy richness offers a supportive base for stronger herbal qualities.

The marzipan bees were seriously not going to happen, both because I don’t do cutesy and because I had no marzipan anyway. Since the cake has a very long baking and cooling time, I had ample opportunity to perpetrate a different act of candy-making insanity. Thinking that the finished cake would need some kind of decorative topping to relieve the white blankness of the frosting, I dug out a recipe for honey nut crunch from The Cake Bible, replacing the original almonds with some of the tons of sesame seeds I have in stock. I won’t give you the recipe for the resulting brittle, which I smashed into dust and sprinkled over the finished cake, because I wouldn’t want anyone else to indulge in that level of pathological ambition. Also, while pretty and certainly crunchy and redolent of honey when freshly made, it was incredibly sticky (duh) and clumped hopelessly by the next day, even in completely airtight conditions.

This week’s Sunday baking dented further my strategic chocolate reserves and used up the penultimate block of cream cheese. The cake, frosting and candy together used up an entire nearly-full jar of honey. One down, six more to go!

Chocolate Honey Cake with Honey Cream Cheese Frosting
(Adapted from Nigella Lawson’s Feast)
Serves 12-16

Cake:

4 ounces bittersweet chocolate, chopped
1 1/2 cups (11 ounces) packed light brown sugar
1 cup (2 sticks) butter, softened
1/2 cup honey
2 eggs
1 1/2 cups (7 1/8 ounces) all-purpose flour
1 tablespoon cocoa, sifted
1 teaspoon baking soda
1/8 teaspoon salt
1 cup boiling water

Frosting:
8 ounces (1 block) cream cheese, softened
1/2 cup (1 stick) unsalted butter, softened
3/4 cup powdered sugar, sifted
1/4 cup honey
1 teaspoon vanilla paste or extract

Preheat oven to 350 F. Line a 16×4 inch loaf pan completely with aluminum foil.

In a mixer, beat together the butter and sugar until fluffy, then add the honey. Beat in the eggs one at a time, adding a tablespoon of flour with each egg. Fold in the melted chocolate.

Whisk together the remaining flour, cocoa, baking soda and salt, and mix gently into the butter mixture. On low speed, mix in the boiling water to create a very liquid batter.

Pour the batter into the prepared pan and bake until the cake is firm and a tester comes out clean, 50-60 minutes. Cool the cake completely on a rack.

While the cake is cooling, beat together the cream cheese and butter for the frosting until light. Add the sugar and beat again until fluffy, then mix in the honey and vanilla. Cover tightly and refrigerate until ready to use. The honey will keep it very spreadable even straight from the fridge.

When the cake has completely cooled, lift it from the pan by using the foil. Peel away the foil, and spread the top generously with the frosting. Slice into 1-inch slices or 2-inch squares as preferred.

Notes:

I used the loaf pan because I bought it an unconscionable number of years ago and had yet to actually bake Pullman loaf bread (its designated use) or anything else in it the entire time I’ve had it. I also thought it would be much easier to portion the cake among more people in neat slices from a loaf.

Nigella’s original recipe used a 9-inch springform pan, which you could revert to if you don’t have a similarly compulsive cookware buying habit. Just make sure you line the pan tightly and completely with the foil, since it’s a very liquid batter and will seep out any cracks in a springform pan if permitted to.

Sidewalk Table and Jacarandas Not Included

22 Tuesday Jul 2008

Posted by nererue in Desserts, Sunday Night Baking

≈ Leave a comment

Tags

brownies, chocolate, coffee, cookies, cream cheese, dulce de leche

Your dentist is going to hate me.

Your dentist is going to hate me.

This week’s Sunday sweets blogging was partly pantry-clearing and partly nostalgia-tripping.

For our anniversary last year, His Lordship and I took a greatly-postponed honeymoon trip to Argentina. The idea was to show him where I came from, visit my pasta-producing grandmother, and consume unseemly quantities of amazing — and amazingly cheap — local food products, particularly artisanal ice cream in my case and grass-fed beef in His Lordship’s case.

Regular breaks for beverages and a nibble at cafes during our outings were a daily feature of our life during the trip, because it’s a daily feature of life in Buenos Aires for everyone. There are at least two on every block, and in the busier areas it’s probably closer to half a dozen, all serving a million variations on coffee and a comprehensive assortment of light meals, pastries and snacks.

They’re open from morning, when you can start your day off right with cafe con leche and the standard tres medialunas, until the ungodly hours of the night, when you can stumble in for empanadas or sandwiches at the end of or as a break from your club-hopping rounds. No one will bat an eyelash at any time in between if you order one cup of coffee and then sit for two additional hours reading your paper or engaging in heated philosophical debate with your friends. Indeed, it’s quite likely the waiter will never return to see if you need something more anyway, since it’s expected that you’re there to sloth away a good chunk of time.

In short, Buenos Aires’s cafe culture makes Seattle’s vaunted caffeine scene look like a parvenu bastard second cousin. It’s fantastic, and I’ve been longing for that level of urbanity ever since. Which is why, when I was thinking of what to bake for Monday morning and staring at a gift-sized jar of dulce de leche left over from that trip and three blocks of cream cheese inherited from the aforementioned departing friend, I thought about brownies.

Brownies seem to have landed with a vengeance in Buenos Aires, since we ran into them in practically every cafe we visited. It was an unexpected amusement to scroll down a menu and see “brownie”, with no translation at all, sandwiched between traditional offerings like flan and pastafrola, a lattice-topped quince tart I will get around to making if I ever find fresh quinces again. In striving not to be the ugly American, I never ordered a food I could easily get back home, but we did get a few dainty brownie bits once as part of the cafes’ universal and impeccably civilized custom of offering a complimentary cookie, chocolate or other treat with your coffee (are you listening, Starbucks?). They were completely respectable brownie bits and went quite nicely with cafe dobles and leisurely conversation.

Although I never actually saw such a thing while we were there, it would be perfectly in keeping with Argentine sensibilities to add dulce de leche to brownies, since there’s pretty much nothing sweet that won’t at some point be embellished with the national condiment. My favorite heladeria already does this in reverse, adding brownie bits to dulce de leche ice cream. True to my ancestry, I’ve been known to warm a few spoonfuls from my normally jealously-guarded supply until liquid and dribble it Pollock-fashion over finished brownies with a sprinkling of toasted pecans or walnuts.

But that wasn’t going to be enough to finish off the jar this time, and I do have to use up all that cream cheese, so I decided to swirl the two together into an espresso-embellished brownie base. While rummaging through my strategic chocolate reserves (what, doesn’t everyone have one?), I discovered that we also still had Argentine semisweet chocolate left, the kind used to make the drink whimsically known as a submarino by dunking a whole segment into steamed milk and stirring once it’s started to melt. For the sake of authenticity, I decided to throw that in too.

I’m now almost out of espresso powder, have whittled down my strategic chocolate reserve, and that jar of dulce de leche is done. I might up the dulce de leche amount to a third of a cup next time for even more of a trademark hit, but otherwise I was quite pleased with their rococo appearance and coffee-and-caramel-kissed taste. It’s not the same as kicking back at Cafe Tortoni, but it’ll hold me for a little while.

Submarino!

Submarino!

By the way, thanks to my bicontinental mother, I still have an additional unopened 1-kilo can of dulce de leche, so be on notice that we’re in for many more applications in the coming weeks.

Buenos Aires Cafe Brownies
(Very loosely adapted from Cook’s Illustrated’s The Best Recipe)
Makes 1 13×9 panful, approximately 18 brownies

Chocolate base:
3 5/8 ounces (2/3 cup) unbleached all-purpose flour
1/2 teaspoon baking powder
1/4 teaspoon salt
2 ounces semisweet chocolate, chopped
4 ounces bittersweet chocolate (70% cocoa solids or higher), chopped
8 tablespoons (1 stick) cold unsalted butter, in quarters
7 ounces (1 cup) granulated sugar
1 teaspoon espresso powder
2 teaspoons Kahlua
3 large eggs

Dulce de leche cheesecake base:
8 ounces cream cheese, softened
1/4 cup dulce de leche
1/2 teaspoon vanilla paste
1 egg yolk

Set oven rack to lower-middle position and preheat oven to 325 F. Line a 13 x 9 baking pan with two perpendicular sheets of nonstick aluminum foil or parchment paper, leaving overhang as handles for removing the cooled brownies later.

Whisk the flour, baking powder and salt together in a medium bowl.

In a large glass measuring cup, combine the chocolate and butter and microwave at 50% until chocolate has completely melted, stirring frequently. Stir in the sugar, espresso powder and Kahlua, and allow to cool slightly. Whisk in the eggs, one at a time, until completely smooth. Add the dry ingredients, stirring until just combined.

In a small bowl, whisk together the cream cheese and dulce de leche until uniform. Stir in yolk and vanilla.

Spread half the chocolate mixture in the bottom of the pan. Drop half of the cheesecake base on top in evenly-distributed large spoonfuls. Repeat with remaining half of mixtures. Using a chopstick or wooden spoon handle, gently swirl the batters together to create a marbled effect. Over-mixing will blur and muddy the swirls.

Bake for 30 minutes, or until a toothpick inserted into center emerges with a few moist crumbs attached. Cool completely on a wire rack and cut into squares just before serving.

Notes:

The basic recipe for the brownies was baked in an 8×8 pan. Since I knew these would be significantly sweeter and richer, I decided to stretch the batter into a bigger pan, and got thinner, chewier brownies closer to what His Lordship looks for. If you want thicker and fudgier, bake this in the smaller pan for around 40-50 minutes, although you’ll still probably have to cut them into smaller-than-average squares.

Pictured is my favorite brand of dulce de leche, determined during the aforementioned trip via purchase and side-by-side tasting of half the dulce de leche aisle at the nearby supermarket. La Salamandra is one of the most readily available in the U.S., albeit at highly inflated prices.

My brother remains faithful to San Ignacio, the brand we grew up with courtesy of our then-jetsetting grandmother. San Ignacio was the close runner-up in my taste test, edged out by the slightly more prominent fresh-milk top note of La Salamandra.

The Return of Sunday Sweets Blogging: Pumpkin Spice Cake with Dulce de Leche Frosting

05 Monday Nov 2007

Posted by nererue in Sunday Night Baking

≈ Leave a comment

Tags

cake, cream cheese, dulce de leche, pumpkin, spice

img_1842.jpg While my blogging schedule has suffered a massive lapse, I didn’t give up my habit of baking on Sunday evening and bringing the results into work on Monday morning.

Appropriately for the season, last Sunday’s baking effort was a pumpkin sheet cake, iced with a quick caramel buttercream made with a cup of dulce de leche. Although it’s readily available in specialty stores these days (unlike my childhood when it required a visit by relatives from the southern hemisphere), in the event that you can’t locate dulce de leche or its Mexican equivalent, cajeta, you could easily forego frosting the cake and simply dust it with powdered sugar instead.

With or without the frosting, the cake is moist, spicy and a snap to put together.

Pumpkin Spice Cake
2 1/4 cups all-purpose flour
1 1/2 teaspoons pumpkin pie spice
1 1/2 chai spice powder (see Notes)
1 teaspoon baking soda
1/2 teaspoon salt
1 3/4 cups packed light brown sugar
4 large eggs
1/2 cup sunflower seed or nut oil
1/2 cup grapeseed or canola oil
1 15 oz can solid-pack pumpkin

Preheat oven to 350°F.

Grease and line with parchment paper or nonstick foil a 13- by 9- by 2-inch baking pan.

In a medium bowl, whisk together flour, spices, baking soda, and salt.

In a large bowl, whisk together brown sugar and eggs in a large bowl until sugar is fully incorporated, with no lumps. Whisk in the oil and pumpkin purée and combine thoroughly. Add flour mixture and whisk just until smooth.
Pour batter into baking pan and bake in middle of oven until springy to the touch and a tester inserted in center comes out clean, 30 to 40 minutes.

Cool on a rack for 10 minutes, then run a knife around edge and invert onto rack. Peel off paper and cool cake completely.

Spread top of cake with dulce de leche frosting (see below) and chill thoroughly to set before serving.

Dulce de Leche Frosting
1 cup (2 sticks) unsalted butter, at room temperature but still firm
1 cup dulce de leche
1 cup powdered sugar
1 tablespoon vanilla paste or extract
Generous pinch of salt
1-2 tbsp half and half

Whip butter in standing mixer for 30 seconds to lighten, then add dulce de leche and sugar and beat until light and fluffy, approximately 1-2 minutes. Beat in vanilla and salt, then add sufficient half and half to thin to a spreadable consistency.

Notes:

The chai spice powder idea comes from the inventive Chockylit at Cupcake Bakeshop and has been great fun to use ever since I discovered it. If you don’t want to bother, the equivalent amount of pumpkin pie spice, apple pie spice, or extra cinnamon, ginger, allspice and cloves in proportion to your taste is easily substituted.

Pie? Meh, but Cupcakes I Can Get Behind.

25 Friday Nov 2005

Posted by nererue in Celebrations, Desserts

≈ Leave a comment

Tags

cream cheese, cupcakes, honey, mascarpone, pumpkin, spice


We never had pumpkin pie for Thanksgiving when I was growing up. While my mother adopted Thanksgiving with a vengeance when she first discovered it as an immigrant, her nearly-wholesale appropriation stopped short of the dessert course. She never cared for pumpkin pie, probably because she dislikes cloves and allspice, so we usually had some variation on apple pie (pie, strudel, even tarte tatin) instead. As an adult, though, I’ve thrown off my mother’s aversion to the spices usually found in pie, and I’ve also become really fond of pumpkin as a dessert medium, although pie is still not my favorite use for it, partly because really good pie dough without hydrogenated fat is my personal demon and constant nemesis, and partly because there are so many more interesting possibilities for pumpkin.

For the past few years, I’ve been alternating between the flan/creme brulee end and the cake ends of the spectrum. This year, I decided to follow the example of the very inventive Chockylit at Cupcake Bakeshop, because, in addition to being cute, leftover cupcakes would be much easier to take to work than a partially-consumed cake. I used the same recipe for the cakes, but I’m just not convinced by the combination of pumpkin and chocolate. I opted for a mascarpone and cream cheese frosting instead, based on a recipe I’d seen on Everyday Italian (yeah, she’s annoying, but at least she does have a legitimate grounding in terms of both training and Italian cuisine). The results were both yummy and attractive, although next time I might double the amount of frosting, since there was only enough to cover eighteen cupcakes, and not particularly generously, either.

I won’t re-post the cupcake recipe, since I didn’t modify it at all (although it made twenty-four rather than thirty in my muffin tins, probably because I always resist underfilling the cups), but I’ll post the frosting recipe, since I added vanilla and since the Food Network pulls recipes after a while.

Mascarpone Cream Cheese Frosting
Makes enough to lightly frost 18 cupcakes

3 oz cream cheese
3/4 stick (6 tablespoons) unsalted butter
1/3 cup mascarpone cheese
3 tablespoons honey
1 teaspoon vanilla extract

Let the cheeses and butter come to room temperature, then beat together the cream cheese and butter until light and fluffy. Beat in the mascarpone until combined, then the honey and vanilla extract.

Chill until firm.

Top Posts & Pages

  • A Pampas-Worthy Vegetarian Empanada

almonds apple apricot asparagus beans biscotti bread brownies butter buttermilk Cacao Nibs cake caramel cashew cheese cherry chiles chocolate citrus coconut coffee cookies corn cranberry cream cream cheese cupcakes dulce de leche eggs figs ganache garlic ginger greens hazelnut honey jam lemon lentils macadamia mascarpone molasses muffins oats olive oil onions pasta pastry pear pecans pie pistachios potatoes pudding pumpkin quince red pepper rhubarb rice rosemary salad sauce sesame soup sour cream spice strawberry tart tea tofu tomatoes vegan walnut wine yogurt

Archives

  • January 2014
  • December 2013
  • August 2013
  • July 2013
  • April 2013
  • February 2013
  • January 2013
  • December 2012
  • November 2012
  • September 2012
  • March 2012
  • January 2012
  • November 2011
  • October 2011
  • September 2011
  • August 2011
  • December 2010
  • November 2010
  • October 2010
  • September 2010
  • June 2010
  • May 2010
  • April 2010
  • March 2010
  • February 2010
  • January 2010
  • December 2009
  • November 2009
  • October 2009
  • March 2009
  • February 2009
  • January 2009
  • December 2008
  • November 2008
  • October 2008
  • September 2008
  • August 2008
  • July 2008
  • June 2008
  • May 2008
  • January 2008
  • December 2007
  • November 2007
  • October 2007
  • September 2006
  • August 2006
  • June 2006
  • May 2006
  • April 2006
  • March 2006
  • February 2006
  • January 2006
  • December 2005
  • November 2005
  • October 2005
  • September 2005
  • August 2005
  • March 2005
Advertisements

Meta

  • Register
  • Log in
  • Entries RSS
  • Comments RSS
  • WordPress.com

Create a free website or blog at WordPress.com.

Privacy & Cookies: This site uses cookies. By continuing to use this website, you agree to their use.
To find out more, including how to control cookies, see here: Cookie Policy